 |
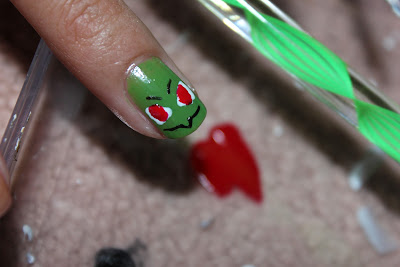
| Remember when pokemon looked like this |
Polish:
- Base and Top coat... (u can tell im getting lazy... but the usual)
- Green - O.P.I. Green-wich Village
- Dark green - China Glaze Holly-Day
- White - O.P.I. Alpine Snow
- Red - China Glaze Poinsettia
- Black - Eleanor
- Dotting tool
- Nail brush
 |
| i really like how bulbasaur turned out > u< |
Step 1: Base coat and then the lighter of the two greens.
Step 2: Dot in two scalene triangles (haha asian math power... >_> not reli) but they kinda point inwards... look at a reference picture if needed.
Step 3: Paint two black lines above the eyes, with a nail art brush. And the mouth... what you can do is paint a full wide slightly curved line then cover the middle with some green polish and add a "v" shape in the hole you created between the to line segments.... or paint it all at once
 |
| sorry step 2 and 3 have the same pic >_> |
Step 5: Using your nail brush, paint two white lines in the red, that extend from the top edge of the red to around the middle, or a little past the middle.
Step 6: Now paint the three or however many you want, splotch things bulbasuar has on his head and well... the rest of his body.
 |
| i just noticed i forgot nostrils... u can add them with black and nail brush but i think this is just fine to " > u< |
 |
| for those who dont know pikachu's on the thumb.... yes theres is a tutorial ;) |
Thanks for the visit! I think this will be the last one i do today, but tomorrow i will continue!
3/10 done :)
-Tiffany o uo


No comments:
Post a Comment