 |
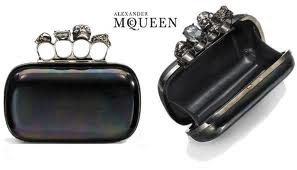
| Original $1,595+ depending on style |
Sooo.... me and Caitlyn are going on a cruise this summer! tho at the end of summer vacation (gahhh so farrrr awayyyy) i need to plan what to wear... since its all formal-ee and stuff at night or captain's dinner and stuff... I have my dress, just no shoes or something to put all my crap in xP sooooooo why not make a clutch O uO I was originally going to buy one but then i fell in love with Alexander Mcqueen's knuckle clutch. Sadly as a student who can't even get hired for her first-ish job, T.T, i have NO income for me to splurge on a clutch like this. Well... even if i had the money, my mom would kick my ass if i spent it all on a clutch > _<
 |
D.I.Y. Only $20 and if you a old sunglasses case and some rings around the house even less! O uO
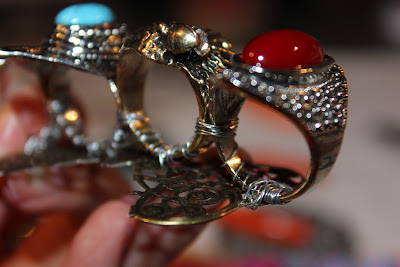
It reminds me of fire & ice |
Materials:
- A nice BIG sunglass case (some asian dollar store... $3.99)
- A knuckle ring, or 3-4 Individual rings a size bigger than your fingers (3 from ardene for $10 and i had the last one laying around)
- Filigree or base for your rings (Michaels it was $5.99 for a pack of 2, 40% off plus 25% off COUPONS O uO so less than $1.50)
- Thin wire (i had 28 gauge wire already)
- Flip Flop glue (i had, u can use any strong glue that can glue metal to fabric)
- Decorations (optional)
- Glitter i used two colours (dollarama... $2)
- Mod Podge (i already had the matt one but if you are going to buy it buy the gloss finish version)
- Gloss Finish Varnish (i had left over, you can get anything that will seal the glitter to the case)
- Rhinestones in needed 3 bags to gather all the clear rhinestones (dollarama... $4.5)
- Studs (i had some already)
- Sandpaper
- Sponge Brush
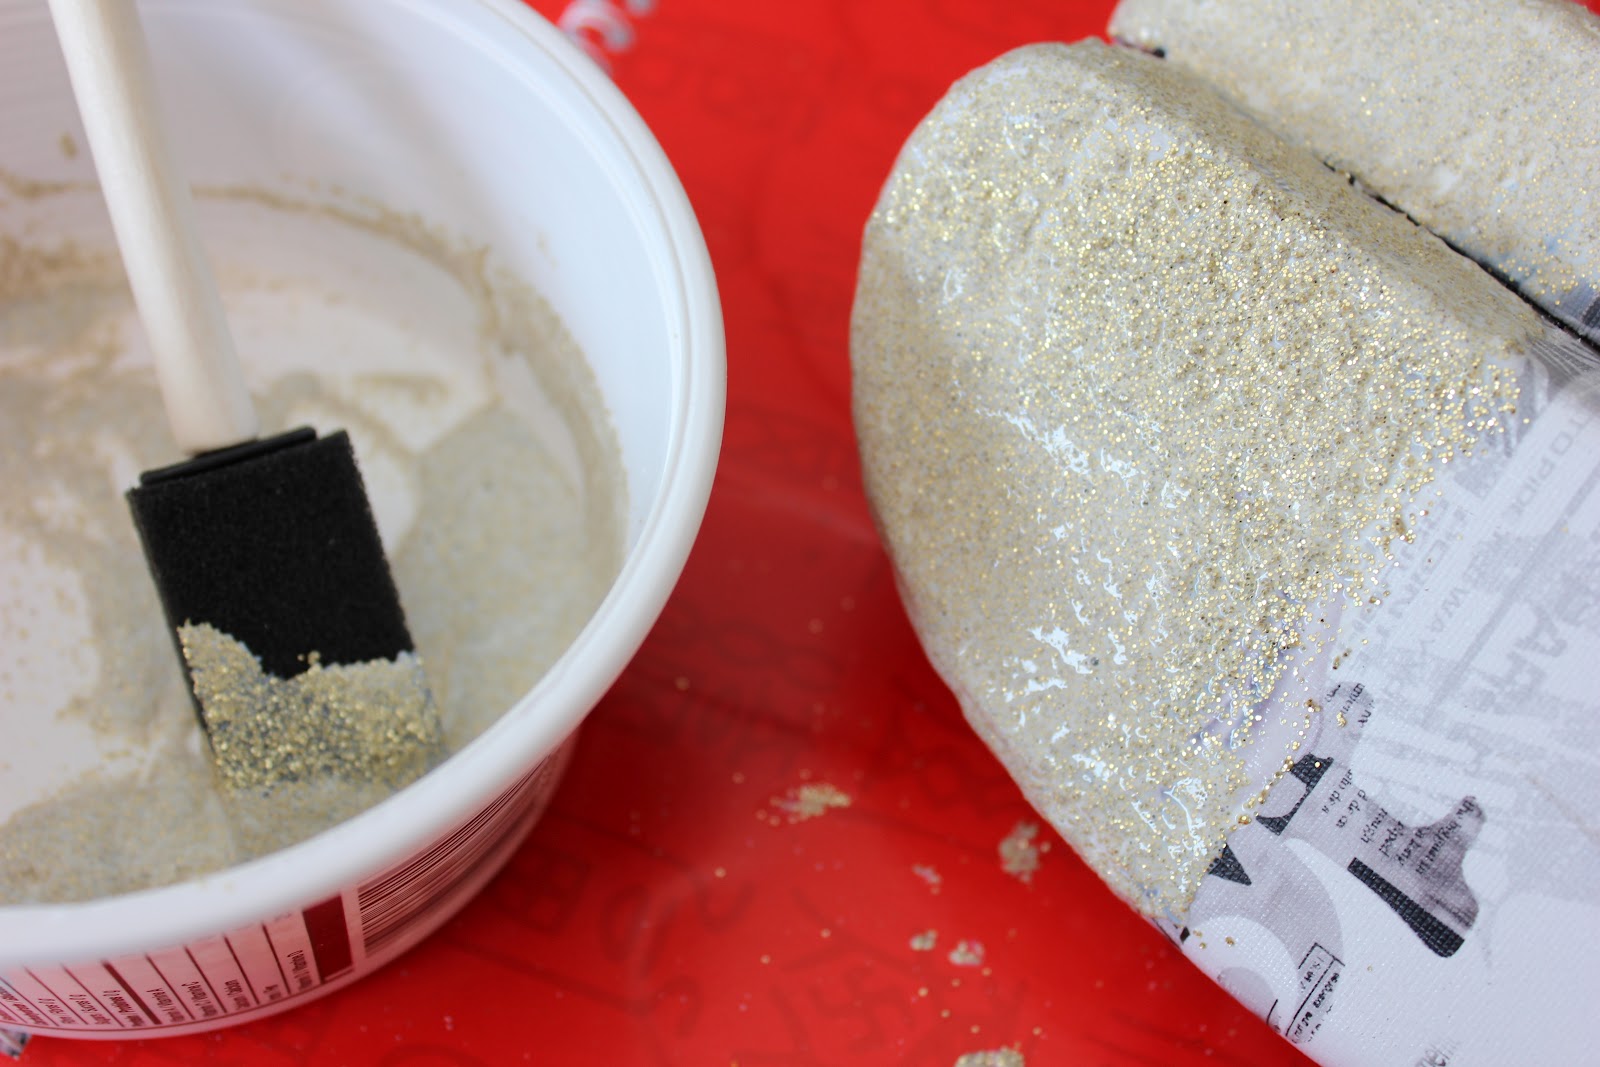
Step 1: Sand the surface to rough it up so the glitter adheres better. Mix the 1 part mod podge to 2-3 part glitter together, or enough mod podge to cover all the glitter but no to liquidly. Then with the sponge brush paint and dab on the glitter on to the surface of your case.


 |
| Don't worry if the glitter isn't shiny right now, it will look pale |
Step 2: Let dry for 2 hours, then spray with your sealant/varnish, and dry for however long the can says. (mine said 24 hours) This will prevent the glitter from rubbing off as much.
 |
| Don't be like me, spray outside! |
 |
| Look how shiny :D see it dries just fine |
Step 3: Next i started gluing the rhinestones and studs on but you should skip to the next step then come back. I did not have my rings yet so i started gluing them on from the bottom.
 |
| I needed more clear rhinestones |
Step 4: When i got my rings and filigree, i used the wire to attach them all together. First i had to cut the filigree because it was too wide, and not long enough for balance. After cutting it, I wrapped the wire around each ring to attach them to each other and the filigree. And saved the rest to glue on to the case as decorations.


 |
| When wrapping make sure the bottom is still flat |
 |
Secure :) this is why the rings should be bigger than you ring
size since the wire will take up space. |
Step 5: Glue the base onto half of the case at the opening. Only on one side or else you'll glue it shut! Then let this dry undisturbed, since the bond must be strong. I let it dry for 24 hours, before continuing.
 |
| Bend the filigree a little to follow the curve of your case. |
Step 6: Finish gluing on the rhinestones, studs, and extra filigree to the body of the clutch in any arrangement. I just wanted it to be covered completely. But you can have a pattern, just leave it covered in glitter, glue lace on, est...
Now your done! Go show off your new clutch to everyone, and tell them that you made it! Hope you have as much fun as me making this!
 |
| > u< it's doneeeeee!!!! |
-Tiffany O uO


Very Well! This is the first time i see the whole process of making knuckle cluch in reality. It is nice and hardworked indeed.
ReplyDeleteknuckle clutch